


As an educator, we are trained to be these highly organized individuals. We label, we color code, we sort and we stack. It’s the only way we can ever be successful. But our students? Not so much. They might be the most unorganized people ever! Trying to get our students organized can be an impossible task. But it doesn’t have to be with a digital table of contents!
In classrooms not equipped to be paperless, teachers rely on students to keep an accurate and organized notebook. Every piece of paper needs to be in this notebook. It is up to the students to know and remember every item they need. How do they do this? With the help of the old fashioned Table of Contents.


Five Easy Steps
-
Students log into their Google Drive. On the left, they click on NEW, and then FOLDER. They name their new folder appropriately for whichever digital notebook unit they will be working on.
-
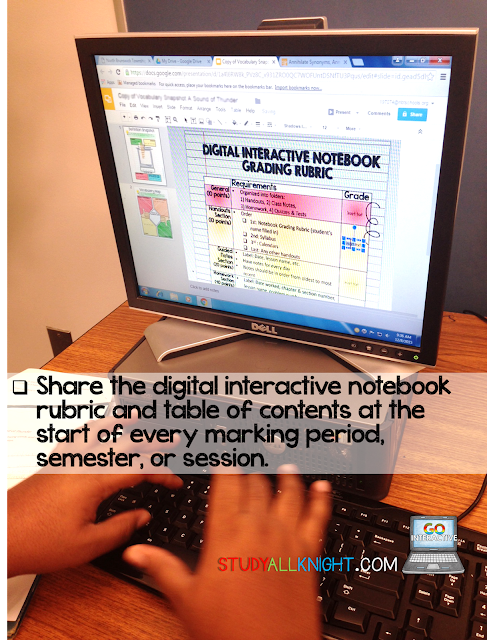
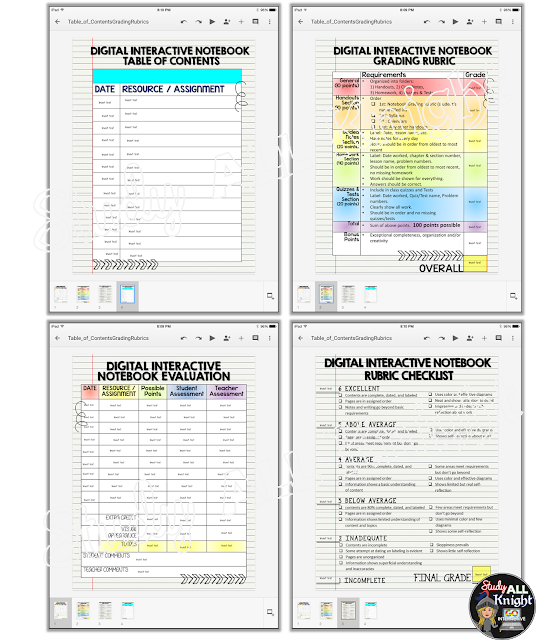
YOU, the teacher, create a Google Sheet set up to resemble a ‘table of contents’ for the digital notebook unit you are working on. You will want to include SOME of the first few documents the students should have in their folder. You will also want to include a section that allows them to manually ‘check off’ each item that they have completed.
-
SHARE this digital table of contents document with each of your students. They will find this shared document in their Google Drive account, under the link called “Shared with me”. Once they open the document, they can “move” to the document to their digitial notebook folder.
-
As the students work through their digital notebook unit, they will be held responsible for updating their now-digital table of contents and checking off each assignment they have completed.
-
Once the unit is complete, the students can SHARE their digital table of contents, as well as the rest of their digital notebook unit, with you. At the point, you can use a pre-made scoring rubric to complete a ‘notebook check’ of all mandatory assignments in their shared folder.
Teaching our students to be organized is KEY to mastery of a unit. Creating the beginning of the digital table of contents give the students a guide as to how it should look and be set up.


